We may earn money or products from the companies mentioned in this post.
Note: This is part 11 of a continuing series. Up until now, I’ve been making an old post public each time I posted a new installment for Patreon patrons, but the latest post (Part 14) is the final article about the Khezvaros world map. I’ll release one of the remaining installments out into the wild on an unspecified and probably irregular schedule until they’re all outside of the paywall. If you don’t want to wait, become a patron! You can find out more about Khezvaros, The City of Ten Thousand Daggers, at World Anvil.
Now that I’ve got my mountains laid out, it’s time for forests. Since the mountains look good, I decide to try using the brush set for the forests as well. I select my land layer (to keep trees out of the water), create a new layer for the forest, turn on my template map, and start adding some forest icons. It does not go well. Even though there are several different types of forest to choose from, it’s hard to line them up without overlap that causes big messy dark spots, changing the size of the various icons creates sections of woods that look different (see the 4 little clumps near the river on the far right), and when woods overlap with other terrain it creates a big mess, even with the forest layer’s opacity turned down.

[I tried several different variations on sizing and using different forest brushes, but forgot to screenshot them, so the above pic is a reconstruction that highlights the problems.]
The forests create the same problem I had with the hills–just too much going on–and that’s before I start trying to make the brushes for deserts and plains and jungles and whatnot try to work. The best Plan B I can come up with is to abandon the brushes, at least as the primary indicator of non-mountain terrain. I might add in some small clumps or individual trees and other terrain later, but I can’t cover the map with brushstrokes and hope for it to remain readable.
Eighty-sixing brushes basically means I’m left with colors, so I go back to the map I started with before putting down any forests and once again create a forest layer and turn on my map template. Since the template already has the colors filled in for me, I can use it to cut down on the amount of painting I have to do. I start out by selecting my template layer and using the “select color range” to pick the color I want to reproduce (in this case the “Temperate Deciduous Forest” color).

Then I go back to my new Forest layer and use the fill tool to paint the selection with the same color. When I turn off my Template, here’s what it looks like:
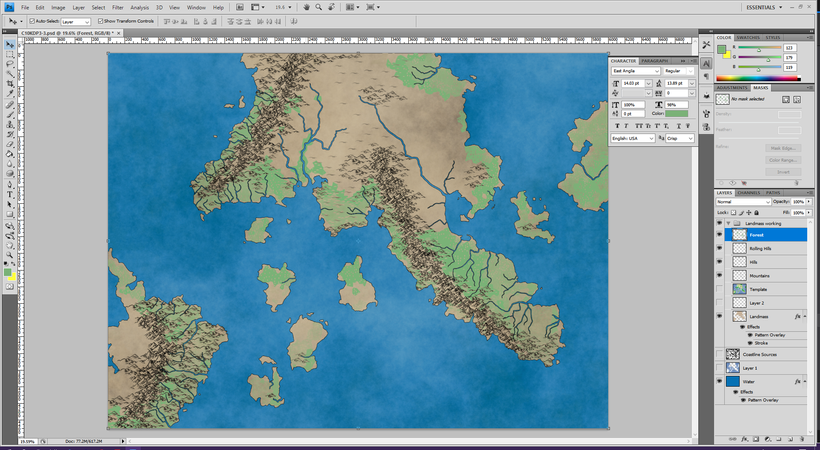
I expected some area to fill in around the edges since my land layer didn’t match up with the original template. However, there also seem to be a lot of dots of tan showing through the parts that should be green. When I zoom in, I see the problem:
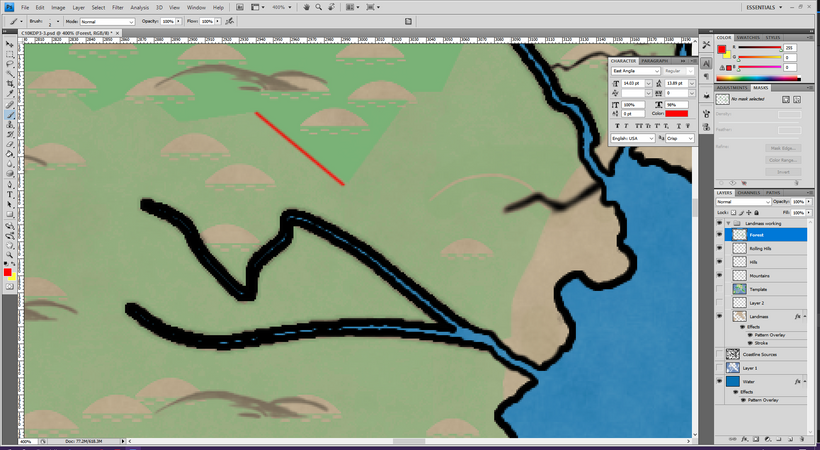
The holes are from the hill (and tree, and other) relief icons on the template. There are also some stark color changes (I marked one of them in red), which I’ve noticed before; they seem to be some kind of artifact of the Fantasy Mapmaker software that you only see when you zoom way in. Since you only see this up close and I plan on adding some layer effects anyway, I decide not to worry about the color changes for now.
The icon voids are easy enough fix. I can just open up Fantasy Mapmaker and export a new map template without the relief layer. Then I paste the exported map as a new layer (keeping the old one in case I need to refer to any icons later), match it up with the old template (which was stretched a bit in an earlier step), and repeat the select and paint process with the icon-free layer.
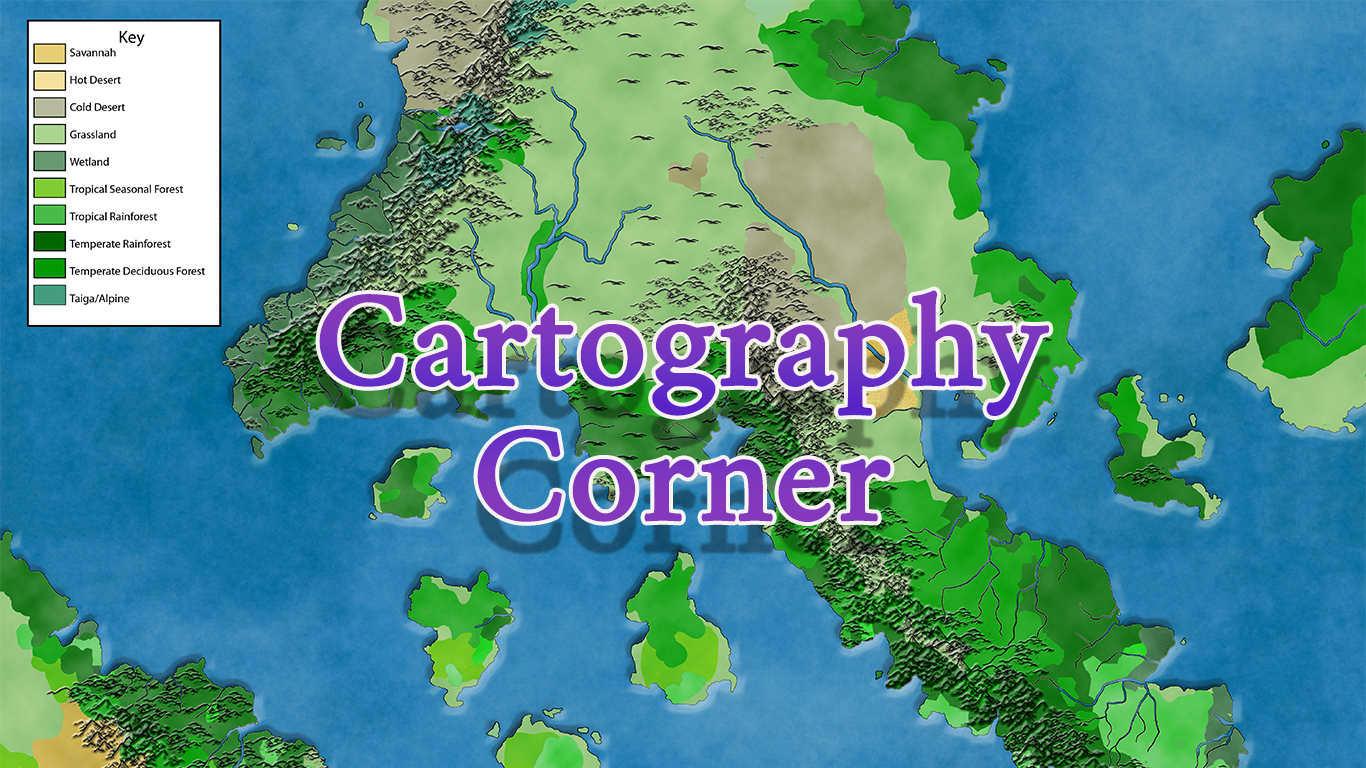
When I go to do this, I realize that the first time around my selection was actually two different types of forest (Temperate Deciduous and Temperate Rainforest). That’s because the Fuzziness setting on my color selector was too high. That’s probably where those lines I noticed came from. After some experimentation, I find that at Fuzziness of 25 seems to work best. The new version looks like this:

I’ll continue this process with all the other terrain types I plan to define mainly with color (possibly all of them), using a new layer for each color just in case I need them to be separate later. Then I’ll fill in the gaps between the original map and my modified coastlines. That seems like it will take a little while, so I’ll show you the end result in the next post.